Watching Blu-ray Movies in HTC Vive With 3D Effects

Summary: A recent announcement says that you will be able to play non-VR games on the Vive. If you want to watching blu-ray in HTC Vive with 3D effects, that on a 3D monitor ie in actual 3D in next tutorial. 


Watching blu-ray movies in HTC Vive With 3D Effects, Blu-ray release dates for new and upcoming Blu-ray releases, in-depth Blu-ray reviews with full HD screenshots, a comprehensive Blu-ray review database with thousands of Blu-ray reviews written by our team of professional Blu-ray reviewers, as well as user ratings and reviews of Blu-ray movies to 3D movies, and much more.

Hot searches


DESTEK Vone 3D VR Headset / ZTE VR review / MP4/AVI to Gear VR

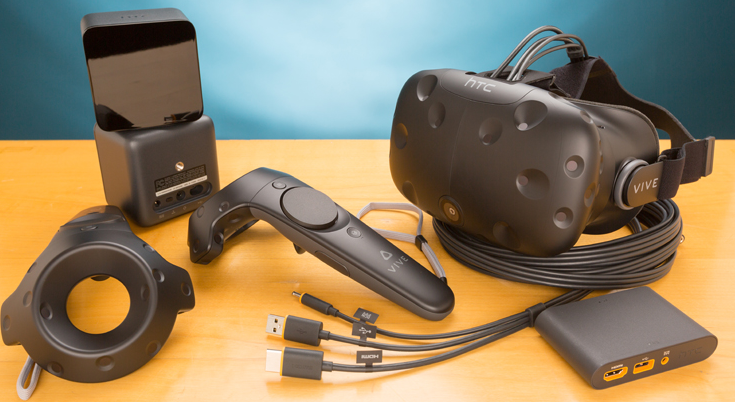
View Blu-ray Movies in HTC Vive With 3D Effects 

There are a few tricks required to be able to watch your own imported blu-ray movies on HTC Vive with 3D effects to get the full experience. If the original format of your videos is not the supported video by VR One like MOV, MP4, then you'd better convert them first. Actually, there are plenty of tools for converting 3D movies, but a professional 3D video converter is what you need indeed. Luckily, Pavtube Video Converter Ultimate is just the right app that can help you to finish the task quickly and easily which also has been proven to be an outstandingMac 3D video converter to convert 3D YouTube FLV, 3D YIFY MKV, Gopro 3D movies or other downloaded incompatible 3D movies, purchased 3D Blu-ray to VR One required side-by-side SBS 3D MP4/MOV effortleassly for enjoying on HTC Vive With 3D Effects.

In addition to 3D movie files, this program also allows you to convert blu-ray and all 2D videos in MP4, AVI, MKV, WMV, MPG, VOB, TiVo, MOV, etc to a decent format as you want. What's more, with the built-in editor, you can trim, crop, adjust special effect to your 3D video, so that you get the very part and effects at your will. Read on to learn a quick guide on how to convert Blu-ray Movies in 3D effects in HTC Vive on windows.

Free download and install
 

Other Download:
- Pavtube old official address: http://www.pavtube.cn/blu-ray-video-converter-ultimate/
-http://download.foxreal.com/
- Cnet Download: http://download.cnet.com/Pavtube-Video-Converter-Ultimate/3000-2194_4-75938564.html

How to convert Blu-ray Movies in 3D effects in HTC Vive on windows. 

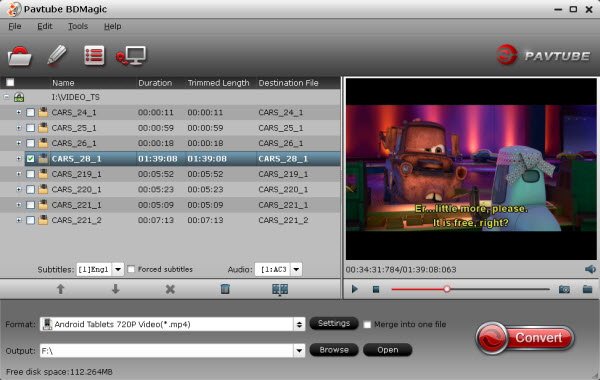
Step 1. Load 3D Video files.

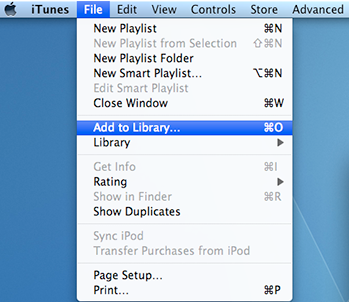
Click “File” icon to load 3D movie source to this 3D Video converter Ultimate. Or you can simply drag and drop the video into it.


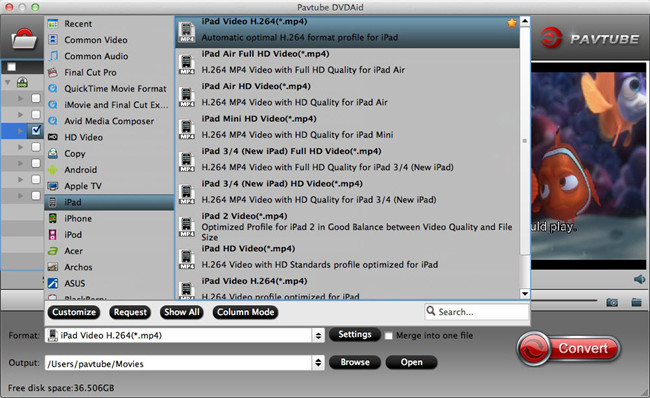
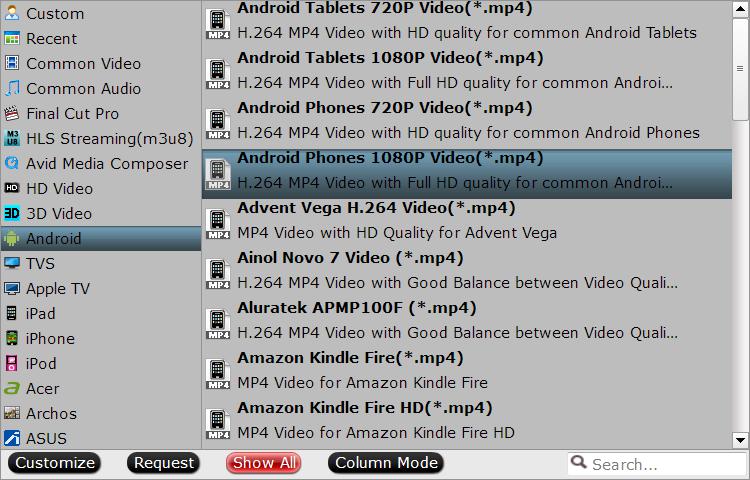
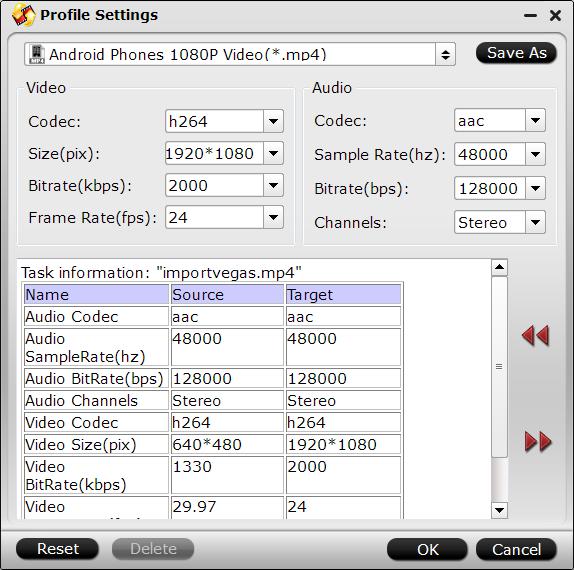
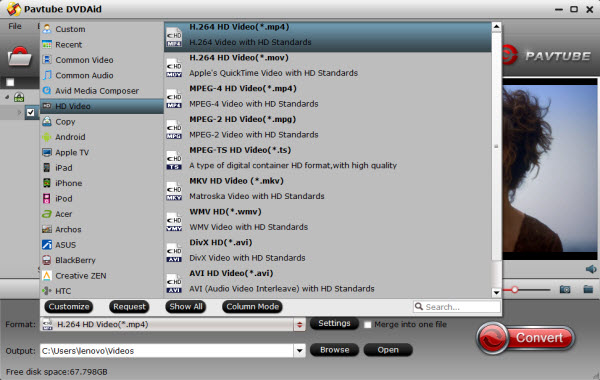
Step 2. Select output profile format.

Tap on Format bane and open profile list. Find and choose the optimized video format for HTC Vive.


Note: Although there is a profile created by the application, we can always change some parameters of resolution, compression, audio, etc. An important issue that you must consider that in Samsung Gear VR resolution for each eye is not FullHD but half the QHD screen. So you can free change your target video size, bitrate, frame rate and 3D depth in “Settings”. If you want to get best video quality, pls switch them to “original”. 3D movies should be encoded “full side-by-side” with a 1:1 pixel aspect ratio. Content mastered at 1920X1080 compressed side–by–side 3D should be resampled to 1920X540 resolution full side–by–side resolution (Learn more) The developer edition has a stated resolution of 1080x1200px, split across both eyes. It’s also sporting a 90Hz refresh rate. Both specs are generally on par which what we’d expect at this stage in the device’s development>.

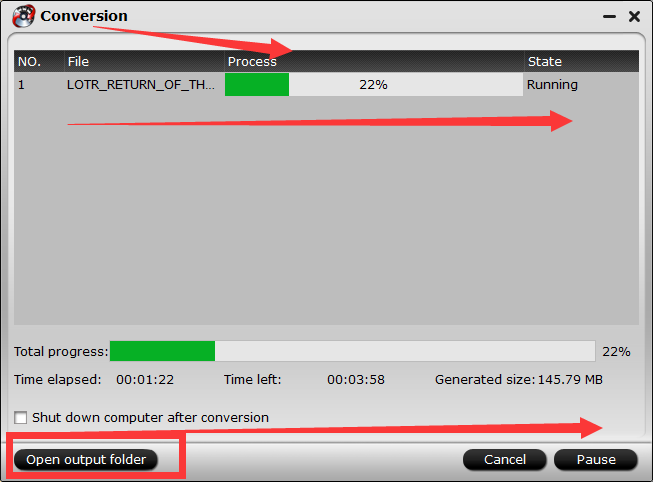
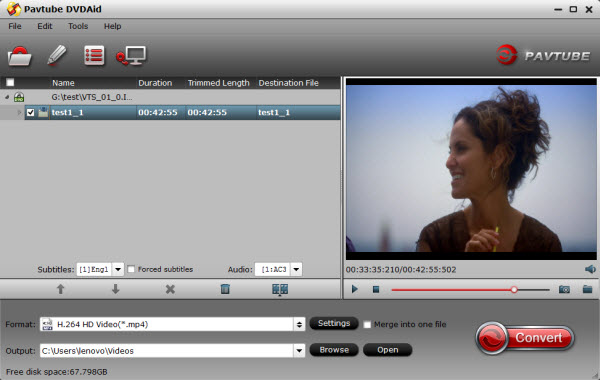
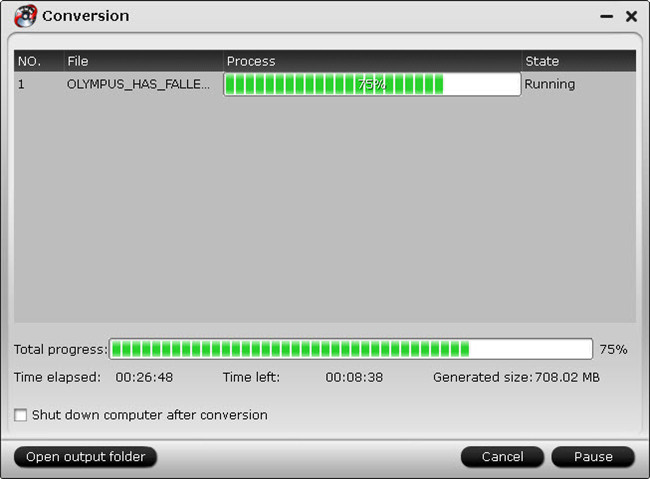
Step 3. Start conversion.

Click “Convert” button and start 3D movie compatible MKV format video conversion. After conversion, you can get the converted files by clicking “Open” button. Then you can watching them by HTC Vive with 3D effects


Much wonderful software bundled with Pavtube Video Converter Ultimate will provide you more amazing experience in converting videos. But if you want to backup DVD to HTC Vive with 3D effects also can using Pavtube DVDAid. Go to Money Saving Software Bundles to get special offer for more software:

ByteCopy($42) + Video Converter Ultimate($65) = Only $79.9, Save $27.1

DVDAid($35) + ChewTune($29) = Only $49.9, Save $14.1

Video Converter Ultimate($65) + ChewTune($29) = Only $74.9, Save $19.1

Related Software: 

BDMagic for Windwos/Mac - The best Blu-ray solution to rip and backup any commercial and region-locked Blu-ray to H.265, M3U8, MP4, MKV, AVI, FLV, etc.
DVDAid for Windows/Mac - Capacity of ripping copy-protected and homemade DVD to iPhone 6S, iPad, Surface Pro, Synology NAS, Seagate Wireless Plus, etc with suitable format.
ByteCopy for Windows/Mac - It can rip Blu-ray/DVD to lossless MKV keeping multi-track subtile/audio and all chapter markers.
Pavtube Video Converter Ultimate for Windows/Mac - Function of converting Blu-ray/DVD, 4K/SD/HD video in any format to nearly all popular video format you have ever seen.

DVDs to iTunes on Windows or Mac OS

Summary: Want to know how to import all Kinds of DVDs files from Mac/PC to your iTunes Library easily? This article provides the easy way. 


How to rip a DVD to digital video format on a Windows computer or on Mac OS X ? Have trouble in importing MP4, MOV, AVI, VOB, Tivo, DIVX, MPEG, FLV, MVI, MKV, 3GP, WTV and more video files in iTune for playing? and how to convert these DVD to iTunes video format for playback or sync to ios devices, Apple TV? The following article will show you the best and fastest way to rip DVD to video and convert DVD movies to iTunes format.

In many ways, a person's DVD collection represents an extensive investment. Naturally, there's the amount of money spent to acquire it, but there's also the essentially collective nature of the medium. DVDs are not being constantly produced, and to lose a rare or difficult-to-find disc can be a severe inconvenience. Given the value placed on our collections and the inherent difficulty in replacing certain favorites, it's not surprising that many people have taken to using DVD copy software to back up their DVD collections.

iTunes, on one hand, is a media player app to play audios and videos, and on the other hand, a media library to download and manage digital music and video files on PC that runs alternatively on OS X or Windows OS, as well as on iPhone, iPad and iPod touch.

Add unsupported DVD video to iTunes Library 

Reason One : iTunes doesn't natively support AVI, VOB, Tivo, DIVX, MPEG, FLV, MVI, MKV, 3GP, WTV, etc as input formats.

Reason Two: Though Apple announced to support MP4, MOV, M4V, we still encounter issue when adding them into iTunes Library since these formats are container formats which may contain codecs that are not compatible with iTunes.

Reason Three: If the file is an unprotected WMA file and you have Windows Media Player Series 9 or later installed, iTunes makes a copy of the file and adds it to your iTunes library. The original WMA file remains unchanged. You can't add protected WMA files or protected WMV files to iTunes.

How to Rip my DVDs to iTunes

If you want to enjoy music or movie on your Apple devices like iPhone, iPod, iPad and Apple TV, the first thing you need to do is to sync videos and audios from your iTunes library to your devices. ITunes is a media player computer program, used for playing, downloading, and organizing digital music and video files on desktop or laptop computers. iTunes could only recognize video files in MP4, MOV, M4V, etc. which means if you want to copy DVD movies to iTunes Library, you should rip DVD to iTunes playable videos before you can sync DVDs to iTunes for playback.

Why choose Pavtube DVDAid Mac to convert DVD to iTunes supported format? The answer is simple. DVDAid to iTunes converter provides good quality output regardless of the end device that you are going to use. It converts DVD to any format supported by iTunes in simple steps. Besides, you can crop the black bars, add special video effects, split or merge videos, etc. as you like with the built-in editor. Just get it and rip videos from DVD disc to iTunes supported videos for playback on device, etc. in just a few mouse clicks!

To do this you’ll be using DVDAid software (Review). They make the best DVD ripping & copying software out there. It’s by far my favorite — very easy to use, fast, and high quality. The first thing you want to do is click the link at the below for a free trial download of this software. That link will start an instant download of this program. Download and install the application from the link above, and you’ll be able to try it out for free. If you like it you can register and buy for the full version right from the program itself.


Other Download:
- Pavtube old official address: http://www.pavtube.cn/dvd_ripper/
- Cnet Download: http://download.cnet.com/Pavtube-DVDAid/3000-7970_4-76158510.html

Simple and Effective Way to Rip my DVDs to iTunes

Step 1. Please insert your DVD disc to DVD drive, just click the “Load DVD” in the top menu “File”, or load DVD folder files by click “Load DVD Folder” , then you can import DVD into DVDChef software for converting.


Step 2. Select iTunes friendly formats and output folder

After you have successfully completed loading your DVD, select the output format and folder. The video formats available are M4V, MP4 or MOV. In this case, we shall select MP4 format from the common video choices only for description purposes. If you do not have a ready folder, you can choose an output path as the destination folder to save the converted movie.


iTunes Supported Format:

iTunes can support the following audio and video files, AIFF (AIFC, audio CD, MP3, System 7 Sound (SND), uLaw (AU), WAV, QDesign, QuickTime audio (audio only movies) AAC (Advanced Audio Coding) as well as MP4. When it comes to video, Apple has allowed iTunes to read only one video format, which includes MPEG-4 (.mp4, .m4v). Meaning you can only convert your DVD to MPEG-4 for you to play them on iTunes.

Step 3. After all things done, you need to do is click the “Converter” button in the bottom right, and it will start copying the DVD movie to your computer. This might take some time. However, it is important to note that the conversion time depends on the size of the DVD movies.


If the transfer is successful you can further transfer the DVD to your iPad Air, iPad Mini 4, iPad 3, iPhoen 7, iPhoen 6, iPhone 6 plus, iPhone 5S, Apple TV 3 and other portable devices and you can easily enjoy them everywhere you wish to.

That, my friends, is how to put DVDs onto iTunes — the absolute best way to do it. Go ahead and give that a try. Enjoy having your favorite DVDs in iTunes and any Apple devices now!

iTunes Supported Importing Format

Want to add or play your video/audio files via iTunes but failed? Check out the supported file formats of iTunes at first.

iTunes Supported Video Formats


According to Apple, iTunes supports any video format that works with QuickTime and files purchased or downloaded from iTunes store. That means if your video files have a .mov, .m4v, or .mp4 file extension, generally you can play them in iTunes. However, there are also limitations on video codecs, sample rate, etc. So if your .mov, .m4v or .mp4 files are rejected by iTunes, that may be because of a codec problem.

iTunes Supported Audio Formats


iTunes supported audio formats include: MP3, AAC, AIFF, WAV, Audible .aa files and iTunes purchased M4A and M4P music files. iTunes can convert between MP3, WAV, AAC, AIFF, Apple Lossless.

Add supported video to iTunes Library

Requirement: iTunes (the latest version iTunes 12.3.3 is recommended); iTunes Store account; Internet access (if necessary)

Note: Before importing or adding videos to iTunes, you need to check if the format of the video you want to add is supported by iTunes. Beyond that, you should also make sure the files can be played in QuickTime (not all .mp4 files will play in Quicktime, for example).

Right-click on the video you want to check and select "Properties" (Windows) or "Get Info" (OS X).
Look for the "Type of file" or "Kind" entry. If the file is an .mkv, .wmv, or .avi file, it will need to be converted.
Test the file in QuickTime. If the file is a supported format, load it up in QuickTime to make sure it plays. If it doesn't play, you'll need to convert it.
1.Rename any video files with multiple periods in the name. Oftentimes videos downloaded from torrents will have multiple periods in the name to denote who ripped and encoded the video. Remove any of these extra periods, as they can cause problems when trying to import into iTunes. Right-click on the file and select "Rename" to edit the name.


2. Launch iTunes. Make sure that you are running the latest version.

3. Import the video. Click the File menu (Windows) or iTunes menu (OS X) and select "Add File to Library" (Windows) or "Add to Library" (OS X). Browse for the converted video and select it.

If you are using Windows and don't see the File menu, press the Alt key.
You will not receive any error or confirmation when adding a video file.

For Windows:


For Mac:


4.Click the "Movies" button. This is located in the row of buttons along the top of the iTunes window, and looks like a film strip.


5.Click the "Home Videos" tab. Any movie you import will be added as a "Home Video". If you don't see the video that you just imported, it wasn't properly converted to an iTunes-compatible format.


6. Move the video to your "Movies" or "TV Shows" library. It can be difficult to find the video you want if they're all sorted into the "Home Video" library. Moving them to the proper spot will make it easier to watch or sync the videos later.

Right-click the video and select "Get Info".
Click the "Options" tab in the window that appears.
Click "Home Video" next to "media kind" to select the library that you want to move it to.
Click OK to save the changes. You will now be able to find the video in the proper library.


7.Sync your movies to your iOS device like iPad, iPhone, iPod, Apple TV, etc. Now that the files are in iTunes, you can sync them to your iOS device. Click here for details on syncing.

If the video does not sync to your device, you'll need to create a version in iTunes that your device supports. Click File and select "Create New Version". Select the device that you are syncing the video to, and then wait for the conversion to complete.

By default, adding items to your iTunes library places a pointer to each file in the iTunes folder; the original file remains in the current location. For information about copying files to the iTunes folder instead of creating pointers to them.

Related articles 

Backup Blu-ray Movies to Samsung Galaxy A9 pro

Summary: When you have Blu-ray movies and want to view them on Samsung Galaxy A9 Pro, you need to rip Blu-rays to MP4 for Samsung Galaxy A9 Pro. 

Samsung company released its new smartphone - Samsung Galaxy A9 Pro in May 2016. From the users opinions and review, this international version gives customers excellent experience. Samsung Galaxy A9 Pro applied Android OS 6.0.1 and has a 6.0 inches display, 1080x1920 pixel, 32GB storage with a microSD card slot. So even if you plan to put many Blu-ray rips on this Galaxy A9 Pro to watch on the move, it still can satisfy you. 


People, especially the youth, usually make their smartphone be a portable media player, not just a tool to connect others. They may download many movie, TV shows, music to kill time when they are free. But not every movie can be found in torrent site. Sometime, the blockbusters are only on Blu-ray discs, or Blu-ray discs. So when you have Blu-ray movies and want to view them on Samsung Galaxy A9 Pro, you need to rip the Blu-rays to Samsung Galaxy A9 Pro supported MP4, AVI, etc digital format with Blu-ray Ripper.

Speaking of Blu-ray Ripper, most of you are likely familiar with the excellent MakeMKV for ripping Blu-rays, but it only can rip Blu-ray to MKV, which is not supported by Galaxy A9 Pro, so you’ll need to get an alternative Blu-ray ripping tool. Here , you need a Galaxy A9 Pro Blu-ray Ripper to rip Blu-ray to Galaxy A9 Pro best playback formats. Pavtube ByteCopy for Windows will be the best choice, it can help you convert Blu-ray to a format that Galaxy A9 Pro supports with the original video quality and audio effect. At the same time, Blu-ray to Galaxy A9 Pro Converter not only can rip and convert Blu-ray to any formats, but also can help you convert DVD to other HD formats for your Samsung Galaxy S7, GalaxyS7 active, Galaxy J3 Pro, Galaxy C7, Galaxy C5, Galaxy J7, Galaxy J5 and Galaxy Tab Note Pro, Galaxy Tab A 10.1, Galaxy TabPro, Galaxy Tab S3, including MKV, AVI, MTS, WMV, etc. Read the review

Note: If you are on Mac, turn to Pavtube ByteCopy for Mac for ripping Blu-ray to Galaxy A9 Pro on Mac (El Capitan included). 
 
How to Rip Blu-ray to Galaxy A9 Pro with High Quality

Now, download Pavtube ByteCopy here.

Step 1: Load Blu-ray files 
Insert Blu-ray disc into Blu-ray drive. Install and run this best Galaxy A9 Pro Blu-ray Converter on your computer. Click “Load Disc” to load your files. You can just simply to drag and drop your backed up files into this program.


Step 2: Select format for Galaxy A9 Pro 

Pavtube ByteCopy offers many optimized video format for different devices. Just click “Format” bar to find “Android” profile. Here, you can choose “Android Phones 1080p video(*.mp4)” format. 


Note: According to Samsung Galaxy A9 Pro specification, Galaxy A9 Pro supports MPEG4, H.263, H.264, DivX, XviD and WMV videos.  

Step 3: Customize output settings 

Besides, click “Settings” button on the interface, you will be able to check and adjust the video and audio parameters like bitrate, size, channels, etc. Just do it when you need.


Step 4: Start Converting Blu-ray to Galaxy A9 Pro 

Click “Convert” button to start Blu-ray to Galaxy A9 Pro conversion. Blu-ray to Galaxy A9 Pro Converter, which allows you to convert Blu-ray up to 6X faster than other converters with GPU Acceleration on the market.

Step 5: Transfer Blu-ray to Galaxy A9 Pro 


After Blu-ray to Galaxy A9 Pro conversion, click “Open Folder” button to locate the converted video files. You can transfer Blu-ray movies to Galaxy A9 Pro via USB cable after connect Galaxy A9 Pro to your computer.

Now, you can view your favorite Blu-ray movies on Galaxy A9 Pro anytime and anywhere. There are many Hollywood Blockbusters in Blu-ray that deserves to watch again and again, you can consider to rip these Blu-rays to Galaxy A9 Pro for playing like the popular The Walk,ZootopiaCaptain America: Civil WarThe Angry BirdsThe Martian, etc.

Additional Tips:

If you are looking for a powerful integrated tool to convert MKV, M2TS, VOB, FLV, AVI, H.265, etc to your Samsung Galaxy A9 Pro, Galaxy TabPro , Galaxy Tab 3, Asus Transformer Prime, Transformer Pad Infinity TF700, Google Nexus 6P, Google Nexus 10/7, Kindle Fire HDX, Galaxy S7/Edge, Nook HD, etc at the same saving time and effort, the all-in-one Pavtube Video Converter Ultimate program will be a nice choice for you. If you are running a Mac OS X computer, iMedia Converter for Mac is the alternative. And for save money, here is a software bundle promotion for you:

ByteCopy($42) + Video Converter Ultimate($65) = Only $79.9, Save $27.1

Related Articles: 

Play YouTube Videos on LG OLED 4K TV

Summary: You can have a nearly perfect 4K TV to watching YouTube videos, and right now LG OLED 4K TV is the best bet around. Period!
Directory overview
  • Play YouTube Videos on LG OLED 4K TV online Using YouTube App
  • Perfect LG OLED 4K TV to watching YouTube videos
  • How to watching downloaded YouTube video on LG OLED 4K TV
  • The steps to take downloaded YouTube video playing on LG OLED 4K TV
  • Suggestion: How to Stream Youtube to LG OLED 4K TV
LG OLED 4K TV uses revolutionary self-lighting pixels, individually controlled to achieve perfect black and infinite contrast. It has an expanded color palette virtually identical to today’s digital cinemas, enjoyable from a wide viewing angle. LG OLED 4K TVs also support standard HDR and Dolby Vision. It's a wonderful thing to watch YouTube videos on a big-screen high-definition LG OLED 4K TV.
With over 4 billion views per day, there is no denying the fact that YouTube is by far the largest and single most successful online streaming services of today. Among its huge directory of videos, a massive chunk is made up of the music videos that we all fondly listen to.
If You have a nearly perfect 4K TV, and you want to watching YouTube videos,or already uploaded on the YouTube summer family films, Christmas movies, recorded video, kids summer camp adventure on TV. So you need a YouTube video converter.
Perfect LG OLED 4K TV to watching YouTube videos
How to watching downloaded YouTube video on LG OLED 4K TV
If you got some YouTube video that cannot be played on LG OLED 4K TV with above listed free video converters, you will need to try Pavtube Video Converter Ultimate (Pavtube iMedia Converter Mac) - a more professional YouTube video converter.
Free download and install
 
The steps to take downloaded YouTube video playing on LG OLED 4K TV
Step 1. Insert downloaded YouTube movie file
Start YouTube to LG OLED 4K TV converter and drag .flv or .mp4 files to the software interface to import the file. It support batch conversion.
Step 2. Select LG OLED 4K TV supported video format
Set output video format as " TV ( LG *.mp4)" under Format > TVS which is LG OLED 4K TV well-accepted file format for its ability to save memory storage and keep up the video quality.
Tip: Before start the YouTube conversion for LG OLED 4K TV, you can click the Settings icon and adjust the video bitrate, codec, frame rate, audio sample rate, etc parameters.
Step 3. Finish converting YouTube video to LG OLED 4K TV
Hit the "Start conversion" button, this video converter will start to convert YouTube .flv or .mp4 to LG OLED 4K TV in no time. After the conversion is over, connect and plug the USB drive or set up DLNA server with computer and head to the destination folder where the converted files are stored, transfer the files to LG OLED 4K TV through USB/DLNA. Let's make YOUTUBE work on LG OLED 4K TV without hassle!
Play YouTube Videos on LG OLED 4K TV online Using YouTube App
If you're using YouTube APP on LG OLED 4K TV from 2016 or newer, you likely have the youtube.com/tv app.
1. Sign in to access YouTube features
Step 1: Find the activation code and sign in
Navigate to the Sign in screen in the YouTube app and stay on this screen until you've completed the remaining steps.
Visit youtube.com/activate on your computer or mobile device.
Sign in when prompted. If you have multiple Google accounts, please select the account you use with YouTube. If you're already signed in, skip to the steps below.
Step 2: Select your channel
After signing in, you may be presented with a list of Google identities associated with your account. This list includes:
Your account's personal identity. If you have a Google+ profile, it's your name; otherwise, it's your email address.
Any Google+ pages managed by your account. These will show up whether or not they are linked to a YouTube channel. Be sure to select a Google+ page that is linked to a YouTube channel. If you select a Google+ page that doesn't have a YouTube channel, you won't be able to sign in.
Step 3: Complete the activation process
Once you've selected an account, enter the activation code shown in the YouTube app on your TV.
Click Allow access and wait for the confirmation screen in the app.
2. Play and control videos
Once you select a video to play, a player control bar will appear allowing you to perform the following actions:
Go home: returns you to the home screen.
Play: will play or resume your video.
Forward: will advance the video by 10 seconds.
Rewind: will rewind the video by 10 seconds.
Captions: will show the video's closed captions, if available.
3. Search for and discover videos
Select the Search Search icon to find YouTube videos. Use the navigation keys to scroll through your subscriptions, recommended videos, playlists and more. You can also use the Send to TV feature to search for videos from a separate device.
Here you go, open up the app and you can freely watch YouTube videos on LG OLED 4K TV. However, playing YouTube videos on LG OLED 4K TV without a hitch may not as easy as you imagine, for aperiodic problems: "YouTube app will stop working on older unsupported SLG OLED 4K TV models", "LG OLED 4K TV having buffering problems for Youtube app due to internet settings", "Im attaching an App that is supposed to play a Youtube Video. Simple.. but soo hard to achieve because of overly full memory", "there is issue with the licensing of YouTube on some Samsung smart televisions".
The available solutions are here: use YouTube via another source, such as a laptop or tablet, set DNS settings to automatic, change this to 8.8.8.8. or 8.8.4.4, reset your system to the original settings. But do you think it is too complicated? That's why many users choose the second way - download YouTube HD or 4K videos and play downloaded YouTube videos on LG OLED 4K TV instead of using app.
Suggestion: How to Stream Youtube to LG OLED 4K TV
Stumbled upon an option to stream youtube to LG OLED 4K TV.
Requirements: PC/Android/IOS device connected to the same network as the LG OLED 4K TV
Scenario for PC:
Internet browser chrome and extension for it google cast extension.
Lets say you are browsing on youtube.com videos and you wanna watch it on a big tv screen.
Just click on the google cast extension icon during watching a particular youtube video, shows you option to which device you want to stream.
In my case LG OLED 4K TV appeared.
Chose your LG OLED 4K TV and you are done.
Benefits: Chromecast is not needed.
Related articles

Backup my DVD collection to work with Plex?

Has anyone ripped their DVD collection to a work with all of hardware including PLEX? I have about 200 DVDs and it seems like it’d be very time consuming and tedious. Is there a good piece of software that I can just take a few minutes to get set the way I want to rip and backup my DVDs to Plex Media Server for streaming? 


Searching high and low online, I finally got some tips and ticks for getting all my DVDs into Plex. To get DVD collection to Plex, what you need to do is to rip DVD into Plex Media Server friendly format like MP4, MKV first. There’s all kinds of different software out there (some free, some not) with a variety of different options. Among them, I found Pavtube DVDAid got top reviews and can be taken as a powerful DVD to Plex converter software to rip copy-protected DVD to Plex- compatible MP4/MKV format with a wink. 

Furthermore, it continuously upgrades to offer you up-to-date DVD backup solution, making it a top contender and worthy of consideration by any DVD to Plex converter buyers. Here I will an easy guide for copying and streaming DVDs to Plex Media Server with a few mouse clicks. This DVD to Plex conversion will be done in good quality and high speed. 

How to Convert DVD to Plex for streaming with Best Video Quality1.Insert your DVD disc to the drive, then launch the DVD to Plex Ripper(Mac version is here) and click the “Load Disc” button to have the DVD content imported. You can also add VIDEO_TS folder, DVD ISO files are the source files for converting. 


2.Click Format bar and choose “H.264 HD Video(*.mp4)” from HD Video, which can be recognized by Plex well. MKV is also a good choice; as a container format it takes whatever you give it. In addition to Plex, you can also copy your DVD Cloud StorageDrobo 5N Network Hard Drive and NAS server for backup. 


Tip: With the right settings you can retain the quality of the original DVD while also saving space. This is particularly helpful when streaming over your network, depending on your network quality. Simply click Settings bar and you can tweak the settings to your satisfaction and even save it as preset. 


3. Finally, hit the “Convert” button at the bottom of the main interface to start the conversion. It will automatically convert DVD to Plex Media Server compatible video files. 
Once the conversion is finished, click “Open” to quickly find the converted movies. Then, Plex will recognize, catalog, play and stream these DVD files at ease. Wanna output a multi-track audio for playing on media players via Plex? Pavtube ByteCopy will be the best choice to do DVD to Multi-track MP4/MKV conversion. 

Top 3D Blu-ray Copy Reviews


People in the modern world prefer to use blu-ray discs in order to save their important files. Blu-ray Disc won the HD format war finally. They have the potential to save more data and are reliable than DVDs. These unique features have played a major role behind the popularity of blu-ray discs and it can also be considered as an excellent alternative available for usb flash drives. In order to save your data into a blu-ray disc, you need to get hold of a reliable free bluray burner. 

Learn more >>> Top Blu-ray ripping software 

If you already have a Blu-ray player that 3D movies works fine, you don’t need to upgrade. The only features that have been added to Blu-ray players recently, such as screen mirroring and 3D upconversion, are inessential. Your play 3D on TV will already upconvert video as well as any inexpensive player, and there are better ways to get your mobile device’s screen to your TV see 3D movies. 

If you want to add streaming services to blu-ray player, you’re better off getting this one - Pavtube ByteCopy. They support far more blu-ray services, have a better user interface, and are faster to use than other blu-ray player. The features of a Blu-ray player should be considered. 

Free download and install: 


Other Download: 
- Pavtube old official address: http://www.pavtube.cn/bytecopy/ 
- Cnet Download: http://download.cnet.com/Pavtube-ByteCopy/3000-7970_4-76158512.html 

The steps to copy Blu-ray 3D movies 

Step 1: Import video. 

Insert your Blu-ray movie to disc drive, and click “Load from disc” button to load Blu-ray from ROM. For video file, click the “Add video” button, browse to computer hard drive and import video into this app. 


Step 2: Select format and set profile. 

Tap on “Format” bar and find “3D Video”, there are a lot of format options for you. “MP4 Side-by-Side 3D Video (*.mp4)” is recommended for blu-ray player 


Tip: We recommend using 1280x720 HD resolution to encode your videos. Higher resolutions will not provide any better quality, meaning you'll waste space and processing power. 

We also recommend using a higher bit rate than a typical web stream at that resolution, as the pixels in your video will be magnified on the phone's screen. The optimal bit rate is content dependent, and many videos can get by with less, but 5 Mb/s should give good quality. 

While H.264 is the recommended video coding, H.265 videos can also be played. 

3D movies should be encoded “full side-by-side” with a 1:1 pixel aspect ratio. Content mastered at 1920x1080 compressed side -by- side 3D should be resampled to 1920x540 resolution full side -by -side resolution.. 

Step 3: Convert 3D Content to SBS 3D MP4. 

Click “Convert” button, video to SBS 3D MP4 conversion begins. When the process finishes, open the output folder to locate. 


For Mac users who wants to convert 3D content to 3D SBS, the equivalent Mac 3D Convertershould be used. 

Here is a list of some of the most popular 3D blu-ray copy applications that can be found on the Internet. 

Related articles 
srl:http://2d-3d-movie-tips.blogspot.com/2016/06/top-3d-blu-ray-copy-reviews.html

Top Blu-ray Ripping Programs Review

Summary: Which Blu-ray Ripper is the best Blu-ray ripping software in 2016? The article gives you Top 5 best Blu-ray Ripper programs review 2015. You can take it as reference to choose the best Blu-ray Ripping Tool for you. 

Blu-ray disc has been widely applied in a variety of ends, especially popular in Blu-ray and DVD movies. Many popular movies have now become available in Blu-ray discs for high quality in both video and audio, just like the coolest "Inception", "D-day Hindi", "Oblivion", "Star Trek", "Dabangg 2", "Monsters University", "Inkaar", "Aashiqui 2", and so on. 

 
If you collect many Blu-ray and DVD discs in home, in order to avoid the favourite Blu-ray movie is scratched by Naughty children, what's more, to play Blu-ray movies on smart TV via a professional Blu-ray player, you need to convert your Blu-ray/DVD discs to a proper formats for playing, so it's necessary for you to purchase a Blu-ray Ripper. 

Here, I list the Top 5 Best Blu-ray Ripper in 2016 according to Google Ranking and user popularity. From where, you can clearly learn about the advantages and disadvantages of Blu-ray Ripping/Copying Tool. 


Top 1. Pavtube BDMagic – Excellent 

Price: Only $34.3 
 
The good: 

Full Disc Copy 


You can import all kinds of Blu-ray and DVD sources: BDMV folder, physical DVD, Blu-ray ISO, VIDEO_TS folder, DVD ISO and IFO file, protected Blu-ray Disc and unprotected Blu-ray Disc. Using the "Full Disc Copy" feature, you can preserve the Blu-ray's original file structure, buakup Blu-ray disc to PC with one click. 

Tip: Using "Directly Copy" feature, you can backup Blu-ray/DVD main movie in original format(m2ts or vob) without quality loss. 

Converting lateast Blu-ray/DVD movies 

While Pavtube BDMagic also support convert Blu-ray/DVD to Android, Apple and Windows device friendly formats (iPad Air 2, iPad Mini 3, iPhone 6, iPhone 6 Plus, Apple TV 3, Galaxy S6, Galaxy Tab S, Kindle Fire HD, Kindle Fire HDX, Surface Pro 3, Google Nexus 7 2nd Gen, LG G-Pad, HTC One, etc.), it takes longer. Supporting Dolby Digital 5.1/AAC 5.1 audio as a plus. Moreover, it allows you to trim a specific duration from a movie while allowing you to split movie/divide a movie evenly into multiple segments. 

Fast speed: 
Pavtube application takes advantage of the NVIDIA CUDA technology and AMD APP technology, and the conversion speed can be increased up to 6 times faster than ever before. 

Support adding subtitles: 
Moreover, Pavtube programs support adding *.srt and *.ass subtitles into video and merge into one file for output. 

Support converting 3D to 3D: 

The highly recommended features is that it now support converting Blu-ray/DVDs to 3D Video, which means you can enjoy you Blu-ray/DVD movies on your 3D TV or Media Players with Side-by-Side(SBS), Top-Bottom, or Anaglyph 3D in MKV/MP4/MOV/WMV/AVI format. If you want to protect your Blu-ray disc, save space, while maintaining the original quality, Pavtube BDMagic is the best software you are looking for, it can meet all your needs. 

Highlight Features: 


1. Add H.264 baseline/main/high output profiles 
2. Support H.265/HEVC decode 
3. Support H.265/HEVC encode 
4. Support latest Blu-ray movies. 


The bad: It lets you trim a specific duration from a movie, but not allows you to split movie/divide a movie evenly into multiple segments. 

The bottom line: With decent decrypting capability, high quality video output and considerate backup solution and specific format templates for versatile PMP devices, Pavtube BDMagic ranks top on the Blu-ray ripping application list. 

Editors' note: Pavtube provides excellent customer support service, including lifetime free upgrade of product and technical support. Users can contact the support staff via email for help and suggestion. 

Trial Download: 

Pavtube BDMagic for Windows (Requires Windows XP/2003/Vista/Windows 7/Windows 8/Windows 8.1 Blue/Windows 10) 

Pavtube BDMagic for Mac (Requires Mac OS X 10.10 Yosemite, 10.9 Mavericks, 10.8 Mountain Lion, 10.7 Lion, Snow Leopard 10.6) 


Top 2. DVDfab Blu-ray Ripper – Good 

Price: $60 

 
The good: When it comes to decrypting/hacking Blu-ray discs and DVDs, DVDfab is about as good as it gets. DVDfab Blu-ray Ripper well deserves its high reputation in decryption, and it handles not only AACS, BD+, Region code restriction, but also Cinavia protected Blu-rays. By taking advantage of CUDA accelerating, the conversion time is greatly shorted. If you want to rip a Blu-ray to MKV and keep 2 audio language and external subtitles, DVDfab would be your choice. 

The bad: It is lacking of DVD ripping feature. It does not support AMD APP encoding. The interface is not very intuitive. And DVDfab Blu-ray Ripper costs more than its alternatives. 

The bottom line: DVDfab Blu-ray Ripper decrypts and rips Blu-ray title to various video files playable on next generation consoles like PS3 and Xbox 360, HD player like WD TV Live, or mobile devices like iPod, iPhone, iPad, etc. 

Editors' note: DVDfab has a comprehensive forum where you can communicate with other users and get helpful advices. There’s not support email but you can submit your problem to DVDfab. 

Top 3. Leawo Blu-ray Ripper – Good 

Price: $44.95 

 
The good: Leawo Blu-ray Ripper comes with the popular feature to convert 2D to 3D for users to enjoy the popular 3D effect and exports various HD and popular common video formats (M2TS, AVI, MP4, WMV, FLV, MPEG, MOV, MKV, RMVB, etc). Leawo Blu-ray Ripper has stunning trim and crop feature- it trims movie more accurate and crops video more considerate than its competitors. It can load multiple Blu-ray and DVD movies at a time. If you have tons of movies waiting to rip and feel like having a Blu-ray Ripper queue them several movies for running overnight, Leawo is recommended. 

The bad: Not recognizing Blu-ray ISO or forced subtitle (if there is). GPU encoding is restricted to Nvidia’s CUDA only. There’s no backup option for keeping original movie quality. 

The bottom line: Leawo Blu-ray Ripper is a nice tool for DVD and Blu-ray ripping. There may be some improvements for Leawo to make but it already performs well enough for average users to convert/put Blu-ray and DVD movies to iPad, iPhone, Apple TV, Wii, etc. 

Editors' note: We noticed that audio quality is noticeably degraded when ripping Blu-ray with Leawo Blu-ray Ripper. 

Top 4. Aimersoft Blu-ray Ripper – Fair 

Price: $45.95 


The good: By taking advantage of AMD APP, Intel? Quick Sync Video and NVIDIA? CUDA? technology, Aimersoft Blu-ray ripper converts movies faster and saves your time. It rips Blu-ray/DVD into almost all popular video formats (MP4, AVI, MOV, etc) and features versatile format templates for smartphones, game consoles and MP3 players. Its “Backup” function let users envelop a whole Blu-ray movie into a MKV/DVD into VOB without quality loss. If you’re looking for a way putting movies onto a HTC, Samsung, LG, Sony, or Motorola smartphone, the Aimersoft Blu-ray Ripper is worth checking out. 

The bad: It does not support Blu-ray ISO or BDMV structure. There’s no option for preserving only forced subtitles. Most Blu-ray Discs are not loading to the software. 

The bottom line: Aimersoft Blu-ray Ripper handles DVD ripping as good as any other rippers, but the company really needs to work hard and step forward in Blu-ray Disc cracking. Other than that, Aimersoft Blu-ray Ripper is impressively fast and helpful. 

Editors' note: It seems that Aimersoft does not handle Blu-ray AACS and BD+ encryption properly and the software keeps popping up a message that we should contact customer support during our testing- the customer support staff offers but apologize though. 

Top 5. Xilisoft Blu-ray Ripper – Poor 

Price: $24.98 

 
The good: Xilisoft Blu-ray Ripper can convert both standard Blu-ray videos and 3D Blu-ray videos to SD and HD video formats such as MKV, AVI, WMV, TS, etc. And it can preserve 3D effects when your source is 3D Blu-ray movie. NVIDIA CUDA and AMD APP graphic acceleration technology has been introduced to bring faster conversion experience. 

The bad: The app does not decrypt Blu-ray protections and requires AnyDVD HD to be installed in advance for Blu-ray ripping. DVD ripping is not supported. 

The bottom line: Xilisoft Blu-ray Ripper does not rip movies from Blu-ray Disc, but if you have had the Blu-ray cracked and saved onto computer hard drive, this tool would be helpful and useful for you to enjoy movies on iPod, iPhone, Apple TV, PSP, Xbox, Zune, NDS, Wii, and 3D smartphones. 

Editors' note: This tool is not recommended unless when you want to convert 3D Blu-ray and keep 3D effect. 


More 

How to Stream MKV Video to Chromecast for Playback 
Get started to Stream Video from PC to Roku using Plex Media Server 
Enjoy all high definition media contents on iPhone 6 Plus 
Painlessly Convert MKV, AVI, VOB, WMV, Tivo, MP4, FLV Video to iPhone 6 for Enjoying 
Play Rented 3D Movies with Apple TV on Mac OS X El Capitan 
Stream Videos from NAS to PS3 via DSLR for playback 
Which Budget Consumer Virtual Reality Headset Should You Buy? 
Convert and Play downloaded 3D Movies on 3D TV 

Src 
Top 5 Blu-ray Ripping Programs Review 2015