Summary: Do you often copy DVDs? Do you think your DVD copy speed is too low? Do you want to copy DVD quickly? Here is the tips for quick DVD copies.
Most of us have very busy and fast-paced lives andwe get impatient when the world is not moving at our speed. One thing that easily makes us upset is the slow DVD copying, which may take you 3 hours and it is impossible for you to wait all the time in front of the computer. So how can you quickly copy DVD while maintaining optimal quality? Here are some tips to help you create a quick DVD copy so you can move on to the rest of your day. Tips for Copying DVD Quickly
Computer Hardware
Having updated computer hardware will greatly increase your overall DVD copy time. The DVD drive installed in your computer tower, along with the processor and the memory are all huge players in speeding up or slowing down your copies. DVD drives play a major role because different DVD drives offer varying speeds. You will want to select a drive that offers the best possible speed for reading DVDs.
In addition to the DVD drive, the processor also heavily effects the overall copy time because it determines the speed at which your computer can process information. The faster the processor, the quicker your computer can read applications and provide results. The available memory allows your computer to take in information. If the memory is full, your computer will not be able to process any information because it will have nowhere to store it. These are three of the largest aspects to obtaining the quickest DVD copy time.
Multitasking
A large part of getting more done in less time is the age-old art of multitasking. Chances are that if you want to copy a DVD quickly, there are additional items on your daily to-do list that need to be done. However, you should not use your computer for other tasks while trying to burn DVD copies in a hurry.
While computers are capable of running a number of applications at a single time, it doesn't always mean that the applications are running as fast or as well as they could if they were the only application running. Shut down your apps and let your DVD copy software do its job. You will notice a drop in the estimated completion time, and you will have fewer errors in the process.
Disc Quality
If you try to copy a DVD that has been scratched or has gotten dirty, expect the overall copy process to take longer. Your will need to bypass error messages to move forward with your copies, and some applications may restart the copy or seize copying because they cannot read the disc. While there is little that you can do for a scratched DVD, some DVD copy applications are designed to mend and copy scratched DVDs. You can and should make sure that your DVDs are clean before inserting them into your computer for a copy. Clean your DVDs carefully so that you don't scratch them in the process.
DVD Copy Software
Last but not least, selecting the best DVD copy software is important for faster DVD copies. While the applications do not play as large of a role as the hardware, choosing the right software can assist in or deter from a quicker copy. If you plan to copy a majority of commercial DVDs either to watch in a different format or just to have as a backup make sure that you select the application that has little to no restrictions on copying commercial DVDs. The restrictions could potentially add more time to your copies, and some applications won't allow you to make copies of encrypted DVDs at all. Learn >>DVD Copier Software vs DVD Ripper Software
| Recommended Fast DVD Copy Tool Pavtube ByteCopy is the right software I've found so far to save you a significant amount of time. Scroll down for more detailed info. 6× faster converting speed, rip DVD titles in batch. With multithreading technology and multi-core processing, the fastest DVD ripper, ByteCopy is fast in loading DVDs, and rips DVDs in a matter of a few minutes with no freezing. Rip encrypted DVD movies without any hassle. One impressive feature embraced by the fastest DVD ripper program is its ability to rip copy protected DVDs fast from Paramount, Diseny, Pixar, Dreamworks, Warner Bros, etc. It bypasses any DVD protection technology automatically, be it the newest Disney DRM, region code (1-6), CSS, UOPs, RCE, etc. The fastest DVD copy software can handle damaged DVDs without stuttering, as well. 1:1 rip DVDs with unchanged video quality. You'll be always able to get awesome output quality. You don't have to sacrifice any quality with the fastest DVD ripping tool. High Quality Engine embedded into the the best quickest DVD ripper keeps speed and quality in good balance. The interface is clean, making it deadly easy to rip movies on DVDs.   |
How to Rip DVDs with the Fastest DVD Copier Software?
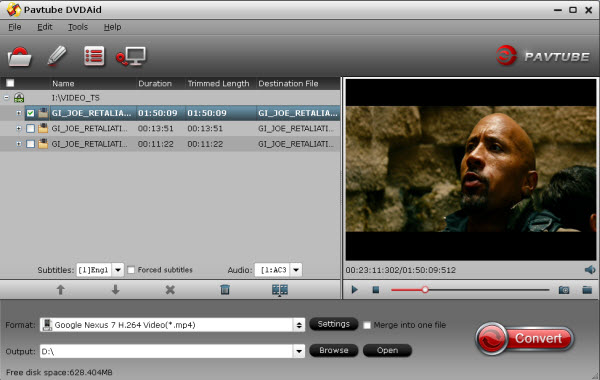
1: Download and install the DVD Ripper abd run it. Insert DVD to computer drive, click "Load from Disc" icon to load the DVD.
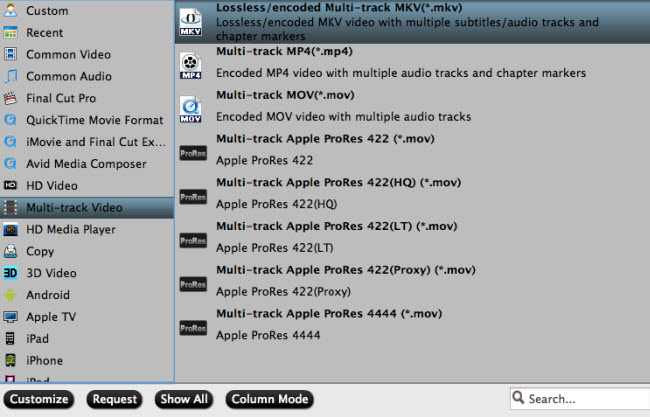
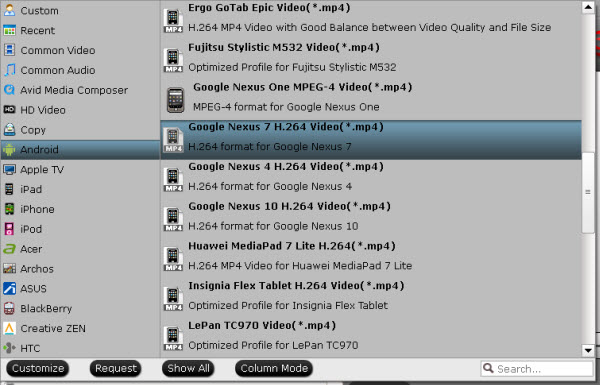
2. Choose output format. The fastest DVD converter enables you to rip and convert DVD to lossless MKV and multi-track MP4, AVI, MOV, etc. digital video format, copy DVD to iPhone, iPad, Samsung, Android etc. Mobile devices, or main title copy, full title copy.
3. Click "Browse" button to select a destination folder to save the DVD copy file. Make sure the space is larger than that of the file.
4 Click "Convert" button to start to copy DVD with the fastest ripper.
By implementing these tips for quick DVD copies, you should find that your DVD copy time has dropped and you are able to get more done in less time. If you find yourself copying DVDs often, we recommend updating your computer hardware and spending the money for a reliable DVD copy application. Don't forget to make sure that your DVDs are clean and unscratched, and you will reach optimum copy times.
Related Articles:
1: Download and install the DVD Ripper abd run it. Insert DVD to computer drive, click "Load from Disc" icon to load the DVD.
2. Choose output format. The fastest DVD converter enables you to rip and convert DVD to lossless MKV and multi-track MP4, AVI, MOV, etc. digital video format, copy DVD to iPhone, iPad, Samsung, Android etc. Mobile devices, or main title copy, full title copy.
3. Click "Browse" button to select a destination folder to save the DVD copy file. Make sure the space is larger than that of the file.
4 Click "Convert" button to start to copy DVD with the fastest ripper.
By implementing these tips for quick DVD copies, you should find that your DVD copy time has dropped and you are able to get more done in less time. If you find yourself copying DVDs often, we recommend updating your computer hardware and spending the money for a reliable DVD copy application. Don't forget to make sure that your DVDs are clean and unscratched, and you will reach optimum copy times.
Related Articles:
- Rip 3D Blu-ray to OnePlus Loop VR for Watching
- Best 5 Free DVD Ripper for Mac including macOS Sierra
- Importing Canon 5D Mark IV 4K to Premiere Pro
- Get Sony Alpha a99 II 4K XAVC S video to Resolve
- Top 5 AVS Audio Converter Alternatives and Similar Software
- Blade Chroma 4K in FCP X with ProRes codec natively on Mac
- Convert Blu-rays on Tablet, Server, HDD, Computer on Mac...
- AnyDVD Alternatives to Copy Protected Blu-ray/DVD On Mac
- Rip All 3D Blu-ray to 3D SBS MP4 for Homido Mini
- Rip All 3D Blu-ray to 3D SBS MP4 for View-master VR
- Rip Blu-ray to Google Pixel XL for watching
- Import Sony Alpha a99 II 4K to Premiere Pro on Mac
- Load Canon EOS 5D Mark IV 4K to iMovie on Mac
- Video, DVD and Blu-ray Media Solution